Каждый месяц у нескольких моих клиентов заканчиваются SSL сертификаты. В основном SSL сертификаты используются на WEB сайтах и почтовых серверах Microsoft Exchange, Замена SSL сертификатов для сотрудников технической поддержки стала уже рутинной задачей, которую они выполняют по инструкции. Моя компания работает с несколькими партнерами: Firstssl и Leaderssl. Наши партнеры обеспечивают надежный сервис и быструю реакцию в случаях технических и организационных затруднений. Тем не менее с 28 февраля 2022 года SSL сертификаты, связанные каким-либо образом с Российской Федерацией или Белорусией проверяются вручную. Ручная проверка обозначает то, что выпуск сертификата может быть более 14 дней. На нашей практике один из сертификатов выпускается уже больше 50 дней. Почтовый сервер Microsoft Exchange более требователен к сертификатам, чем WEB сайты. По этому устанавливая сторонний или само подписанный сертификат, мы получаем проблемы в администрировании и трудности в работе пользователей. Но выход из сложившейся ситуации есть – Let’s Encrypt для Microsoft Exchange Server
Основные условия ручной проверки:
– Домен в зонах ru, рф, by
– Страна Россия или Белорусия в файле запроса сертификата.
В этой статье я хочу показать, как в течении 15 минут можно выпустить и установить сертификат Let’s Encrypt на Microsoft Exchange 2013-2019.
Что такое Let’s Encrypt.
Let’s Encrypt – это абсолютно бесплатный способ защитить наши сервера SSL- сертификатом. SSL сертификат обеспечивает безопасную зашифрованную передачу данных. Основателем Let’s Encrypt является некоммерческая организация, миссией которой является создание безопасного и конфиденциального Интернета. Сообщество поддерживает данный способ выдачи сертификатов и реализует различные библиотеки.
Сертификат безопасности сайта не является доверенным
При установке нового сервера Exchange SSL сертификат выпускается локальным центром сертификации. Из-за этого сразу возникает две ошибки:
- При авторизации в OWA отображается ошибка «Сертификат безопасности сайта не является доверенным»
- Почтовые клиенты, в том числе на мобильных устройствах не позволяют добавлять учетную запись, пока сертификат не будет установлен вручную.
Безусловно, наличие предупреждений браузера о недействительном сертификате не ограничивает работу. Пользователи могут отправлять и получать почту либо в браузере или с помощью подключенного почтового ящика Outlook в локальной сети.
Установка и настройка клиента Let’s Encrypt Win-ACME.
Для установки SSL сертификата нам потребуется ACME клиент. Основным ACME клиентом считается Certbot. О нем вы наверняка слышали, если когда-либо выпускали сертификат для вашего web сайта. Для выполнение нашей задачи, нам потребуется Windows ACME Simple (WACS).
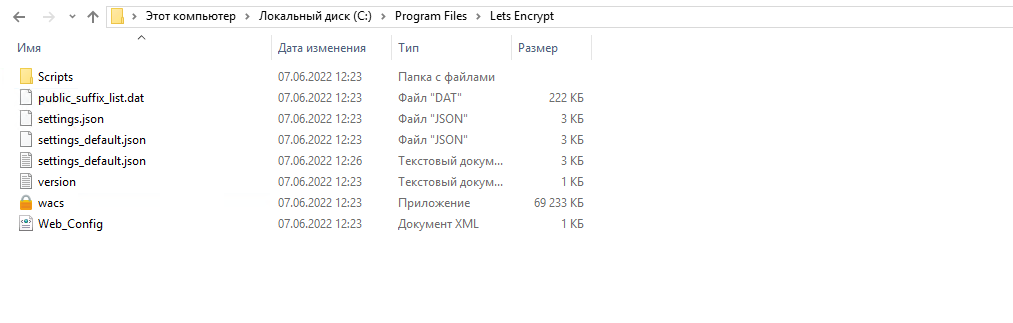
Скачайте Win-ACME с GitHub или официального сайта. На момент написать статьи — это версия 2.1.22.1. Создайте в C:\Program Files\ папку Lets Encrypt и распакуйте файлы из архива Win-ACME.
Перед началом выпуска сертификата измените параметр PrivateKeyExportable в файле settings_default.json, указа значение true. По умолчанию файл находиться в каталоге «C:\Program Files\Lets Encrypt ». Изменив данный параметр, вы сможете автоматически извлечь закрытый ключ.
Установка Let’s Encrypt сертификата на Exchange Server
После загрузки и извлечения файлов вы можете приступить к установке сертификатов Let’s Encrypt. В каталоге C:\Program Files\Lets Encrypt запустите файл wacs.exe с правами администратора. В случае успешного запуска вы увидите командную строку с оболочкой Win-ACME.
Нажмите “М”, что бы создать новый SSL сертификат
 A simple Windows ACMEv2 client (WACS)
 Software version 2.1.22.1260 (release, pluggable, standalone, 64-bit)
 Connecting to https://acme-v02.api.letsencrypt.org/...
 Scheduled task not configured yet
 Please report issues at https://github.com/win-acme/win-acme

 N: Create certificate (default settings)
 M: Create certificate (full options)
 R: Run renewals (0 currently due)
 A: Manage renewals (0 total)
 O: More options...
 Q: Quit

 Please choose from the menu: M
Нажмите цифру 2, для ручного ввода.
Running in mode: Interactive, Advanced

 Please specify how the list of domain names that will be included in the
 certificate should be determined. If you choose for one of the "all bindings"
 options, the list will automatically be updated for future renewals to
 reflect the bindings at that time.

 1: Read bindings from IIS
 2: Manual input
 3: CSR created by another program
 C: Abort

 How shall we determine the domain(s) to include in the certificate?: 2
В появившейся строке введите имя хоста или хостов через запятую. Убедитесь, что имена хостов указаны верно и не содержат внутренние имена. Например: EXCH01-2019. Согласно моему опыту лучше использовать одно и то же пространство имен для внутреннего и внешнего DNS. В пример я буду использовать mail.tucki.ru и autodiscover.tucki.ru.
 Description:        A host name to get a certificate for. This may be a
                     comma-separated list.

 Host: mail.tucki.ru,autodiscover.tucki.ru
Далее Вам будет предложено ввести более понятные имена. Вам следует пропустить данный шаг, просто нажав Enter.
Source generated using plugin Manual: mail.tucki.ru and 1 alternatives

 Friendly name '[Manual] mail.tucki.ru'. <Enter> to accept or type desired name: <Enter>
Далее клиент Let’s Encrypt ACME инициирует подключение к Let’s Encrypt через TCP/80 и TCP/443 порты. Вам следует убедиться, что в Вашем брандмауэре разрешены данные порты. Убедитесь, что вы разрешили все порты, которые Exchange Server использует для работы.
Для проверки домена на следующем шаге нажмите цифру – 2 и нажмите Enter
 The ACME server will need to verify that you are the owner of the domain
 names that you are requesting the certificate for. This happens both during
 initial setup *and* for every future renewal. There are two main methods of
 doing so: answering specific http requests (http-01) or create specific dns
 records (dns-01). For wildcard domains the latter is the only option. Various
 additional plugins are available from https://github.com/win-acme/win-acme/.

 1: [http-01] Save verification files on (network) path
 2: [http-01] Serve verification files from memory
 3: [http-01] Upload verification files via FTP(S)
 4: [http-01] Upload verification files via SSH-FTP
 5: [http-01] Upload verification files via WebDav
 6: [dns-01] Create verification records manually (auto-renew not possible)
 7: [dns-01] Create verification records with acme-dns (https://github.com/joohoi/acme-dns)
 8: [dns-01] Create verification records with your own script
 9: [tls-alpn-01] Answer TLS verification request from win-acme
 C: Abort

 How would you like prove ownership for the domain(s)?: 2
Снова нажмите цифру 2, что бы выбрать RSA ключ и нажмите Enter.
After ownership of the domain(s) has been proven, we will create a
 Certificate Signing Request (CSR) to obtain the actual certificate. The CSR
 determines properties of the certificate like which (type of) key to use. If
 you are not sure what to pick here, RSA is the safe default.

 1: Elliptic Curve key
 2: RSA key
 C: Abort

 What kind of private key should be used for the certificate?: 2
На следующем шаге Вам необходимо выбрать место хранения сертификата. Я использую Windows Certificate Store. Выберите цифру – 4.
When we have the certificate, you can store in one or more ways to make it
 accessible to your applications. The Windows Certificate Store is the default
 location for IIS (unless you are managing a cluster of them).

 1: IIS Central Certificate Store (.pfx per host)
 2: PEM encoded files (Apache, nginx, etc.)
 3: PFX archive
 4: Windows Certificate Store
 5: No (additional) store steps

 How would you like to store the certificate?: 4
Выберите место, где находится хранилище сертификатов. Нажмите цифру 2.
 1: [WebHosting] - Dedicated store for IIS
 2: [My] - General computer store (for Exchange/RDS)
 3: [Default] - Use global default, currently WebHosting

 Choose store to use, or type the name of another unlisted store: 2
На следующем шаге вам будет предложено сохранить сертификат в другом месте. Откажитесь, нажав цифру 5.
1: IIS Central Certificate Store (.pfx per host)
 2: PEM encoded files (Apache, nginx, etc.)
 3: PFX archive
 4: Windows Certificate Store
 5: No (additional) store steps

 Would you like to store it in another way too?: 5
После выпуска SSL сертификат, Вам необходимо обновить связи и привязки HTTPS в IIS. Выберите цифру 1 и нажмите Enter.
With the certificate saved to the store(s) of your choice, you may choose one
 or more steps to update your applications, e.g. to configure the new
 thumbprint, or to update bindings.

 1: Create or update bindings in IIS
 2: Start external script or program
 3: No (additional) installation steps

 Which installation step should run first?: 1
Нажмите цифру 1, что бы выбрать сайт по умолчанию.
 1: Default Web Site
 2: Exchange Back End

 Choose site to create new bindings: 1
Нажмите 2, что бы выполнить внешний скрипт и нажмите Enter
 1: Create or update bindings in IIS
 2: Start external script or program
 3: No (additional) installation steps

 Add another installation step?: 2
Укажите путь для PowerShell скрипта – ./Scripts/ImportExchange.ps1 и нажмите Enter
 Description:        Path to script file to run after retrieving the
                     certificate. This may be any executable file or a
                     Powershell (.ps1) script.

 File: ./Scripts/ImportExchange.ps1
Укажите параметры, для привязки скрипта к службам. Нажмите Enter.
 {CertCommonName}:   Common name (primary domain name)
 {CachePassword}:    .pfx password
 {CacheFile}:        .pfx full path
 {CertFriendlyName}: Certificate friendly name
 {CertThumbprint}:   Certificate thumbprint
 {StoreType}:        Type of store (e.g. CentralSsl, CertificateStore,
                     PemFiles, ...)
 {StorePath}:        Path to the store
 {RenewalId}:        Renewal identifier
 {OldCertCommonName}: Common name (primary domain name) of the previously
                      issued certificate
 {OldCertFriendlyName}: Friendly name of the previously issued certificate
 {OldCertThumbprint}: Thumbprint of the previously issued certificate

 Description:        Parameters for the script to run after retrieving the
                     certificate. Refer to
                     https://win-acme.com/reference/plugins/installation/script
                     for further instructions.

 Parameters: '{CertThumbprint}' 'IIS,SMTP,IMAP' 1 '{CacheFile}' '{CachePassword}' '{CertFriendlyName}'
Продолжите установку, нажав цифру 3 и Enter
 1: Create or update bindings in IIS
 2: Start external script or program
 3: No (additional) installation steps

 Add another installation step?: 3
Нажмите N, что бы не показывать условия использования и лицензионного соглашения.
Terms of service:   C:\ProgramData\win-acme\acme-v02.api.letsencrypt.org\LE-SA-v1.2-November-15-2017.pdf

 Open in default application? (y/n*) n
Согласитесь с условиями соглашения, нажав Y и Enter
Do you agree with the terms? (y*/n) yВведите ваш адрес электронной почты и нажмите Enter
Enter email(s) for notifications about problems and abuse (comma seperated): info@tucki.ruДалее в командной строке будет вывод генерации SSL сертификата и его установки
 [autodiscover.tucki.ru] Authorizing...
 [autodiscover.tucki.ru] Authorizing using http-01 validation (SelfHosting)
 [autodiscover.tucki.ru] Authorization result: valid
 [mail.tucki.ru] Authorizing...
 [mail.tucki.ru] Authorizing using http-01 validation (SelfHosting)
 [mail.tucki.ru] Authorization result: valid
 Downloading certificate [Manual] mail.tucki.ru
 Store with CertificateStore...
 Installing certificate in the certificate store
 Adding certificate [Manual] mail.tucki.ru @ 2022/5/11 19:56:12 to store My
 Installation step 1/2: IIS...
 Our best match was the default binding and it seems there are other non-SNI enabled bindings listening to the same endpoint, which means we cannot update it without potentially causing problems. Instead, a new binding will be created. You may manually update the bindings if you want IIS to be configured in a different way.
 Our best match was the default binding and it seems there are other non-SNI enabled bindings listening to the same endpoint, which means we cannot update it without potentially causing problems. Instead, a new binding will be created. You may manually update the bindings if you want IIS to be configured in a different way.
 Adding new https binding *:443:tucki.ru
 Our best match was the default binding and it seems there are other non-SNI enabled bindings listening to the same endpoint, which means we cannot update it without potentially causing problems. Instead, a new binding will be created. You may manually update the bindings if you want IIS to be configured in a different way.
 Our best match was the default binding and it seems there are other non-SNI enabled bindings listening to the same endpoint, which means we cannot update it without potentially causing problems. Instead, a new binding will be created. You may manually update the bindings if you want IIS to be configured in a different way.
 Adding new https binding *:443:autodiscover.tucki.ru
 Committing 2 https binding changes to IIS while updating site 1
 Installation step 2/2: Script...
 Script ./Scripts/ImportExchange.ps1 starting with parameters 'D8724E991E59BEA4D3EA364AC1E3EFB2668E932F' 'IIS,SMTP,IMAP' 1 'C:\ProgramData\win-acme\acme-v02.api.letsencrypt.org\Certificates\PTQ-g6p-2E6SpcZkRfpOQA-9abaf6286b9e2fb42d8311899c4c9eb496dd699e-temp.pfx' '********' '[Manual] mail.tucki.ru @ 2022/08/12 20:23:25'
 Script finished
 Adding Task Scheduler entry with the following settings
 - Name win-acme renew (acme-v02.api.letsencrypt.org)
 - Path C:\Program Files\Lets Encrypt
 - Command wacs.exe --renew --baseuri "https://acme-v02.api.letsencrypt.org/"
 - Start at 09:00:00
 - Random delay 04:00:00
 - Time limit 02:00:00
Для автоматического продления сертификата от системного пользователя нажмите N и Enter
 Do you want to specify the user the task will run as? (y/n*) - no

 Adding renewal for [Manual] mail.tucki.ru
 Next renewal due at 2022/7/5 19:55:25
 Certificate [Manual] mail.tucki.ru created
Поздравляю, Вы установили SSL сертификат на ваш почтовый сервер. Для выхода из Let’s Encrypt Win-ACME нажмите Q и Enter.
После несложных действий SSL сертификат был выпущен и привязан к службам Exchange IIS, SMTP, and IMAP.